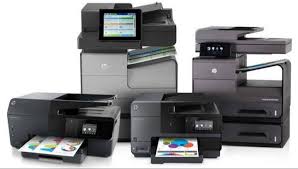
How do I connect and set up a printer, scanner, or other peripheral devices?
BY: DA PUBLISHED: 2024-03-31 13:00:48 | UPDATED: 2026-02-02 23:49:03 | Views: 1497
Connecting and setting up a printer, scanner, or other peripheral devices can vary depending on the type of device and your computer's operating system. Here's a general guide to help you connect and set up peripheral devices:

1. Read the User Manual:
- Before starting, it's essential to read the user manual or setup guide that came with your peripheral device. This will provide specific instructions and recommendations for connecting and setting up the device.
2. Gather Necessary Cables and Components:
- Ensure you have all the necessary cables and components required to connect the peripheral device to your computer. This may include USB cables, power adapters, and installation CDs or DVDs.
3. Connect the Device:
- For printers and scanners, connect one end of the USB cable to the device and the other end to an available USB port on your computer. Some devices may also support wireless connectivity, in which case you'll need to follow the manufacturer's instructions to connect to your Wi-Fi network.
- For other peripheral devices such as external hard drives or webcams, follow the manufacturer's instructions to connect them to your computer using the appropriate cables.
4. Install Device Drivers:
- Most peripheral devices require device drivers to communicate with your computer's operating system. If your device came with an installation CD or DVD, insert it into your computer's optical drive and follow the on-screen instructions to install the drivers.
- Alternatively, you can download the latest drivers from the manufacturer's website. Visit the support or downloads section of the manufacturer's website, search for your device model, and download the appropriate drivers for your operating system.
5. Configure Device Settings:
- Once the drivers are installed, you may need to configure some settings for your peripheral device. This could include setting the default paper size and quality for printers, adjusting image settings for scanners, or configuring audio settings for speakers or headphones.
- Refer to the user manual or manufacturer's website for instructions on configuring device settings.
6. Test the Device:
- After connecting and setting up the device, test its functionality to ensure it's working correctly. Print a test page for printers, scan a document for scanners, or perform a test operation for other peripheral devices.
- If you encounter any issues, refer to the troubleshooting section of the user manual or contact the manufacturer's customer support for assistance.
7. Install Additional Software (Optional):
- Some peripheral devices may come with additional software or utilities to enhance functionality or provide additional features. Install any optional software provided by the manufacturer if desired.
Following these steps will help you successfully connect and set up a printer, scanner, or other peripheral devices with your computer. Remember to consult the user manual or manufacturer's website for specific instructions and troubleshooting tips for your device.
You May Also Like

5G: What It Means for You
1 year agoLatest Videos
Top 5 AMAZING Places to Visit in Ethiopi...
Oct 18, 2025Sea waves & beach drone video
Jun 21, 2025Related Articles

The Future of AI in the IT Industry: Tra...
1 year ago
5G: What It Means for You
1 year ago
