Best practices for upgrading RAM or installing a new hard drive?
BY: DA PUBLISHED: 2024-06-01 15:55:33 | UPDATED: 2026-02-02 22:30:21 | Views: 998
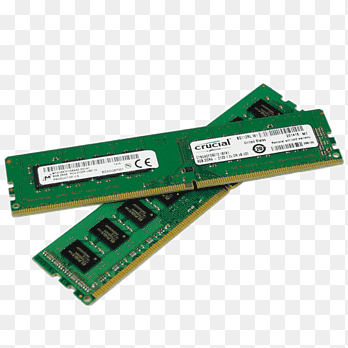
Upgrading RAM or installing a new hard drive can significantly improve your computer's performance. Here are some best practices to ensure a smooth and successful upgrade:

Upgrading RAM
Check Compatibility:
- Identify Your System Specs: Determine the maximum RAM your motherboard supports and the type (e.g., DDR3, DDR4) and speed (e.g., 2400MHz) required.
- Consult the Manual: Refer to your computer’s or motherboard’s manual for specific RAM requirements and recommendations.
Choose the Right RAM:
- Same Type and Speed: For best results, use the same type and speed of RAM currently in your system.
- Capacity: Consider how much RAM you need based on your usage (e.g., 8GB for casual use, 16GB+ for gaming or professional use).
Prepare Your Workspace:
- Static-Free Environment: Work on a non-carpeted surface and use an anti-static wrist strap to prevent static discharge.
- Tools: Have a small screwdriver handy if you need to open your computer case.
Installation Steps:
- Power Down and Unplug: Turn off your computer and unplug all cables.
- Open the Case: Use the screwdriver to remove the side panel.
- Locate the RAM Slots: Find the RAM slots on your motherboard.
- Install RAM: Press the latches on the sides of the RAM slots to open them, align the notch on the RAM module with the slot, and firmly press it in until the latches click back into place.
- Close the Case and Test: Replace the side panel, reconnect the cables, and power on your computer. Check the system properties to ensure the RAM is recognized.
Installing a New Hard Drive
Choose the Right Hard Drive:
- Type: Decide between HDD (larger capacity, cheaper) or SSD (faster, more expensive).
- Size and Interface: Ensure the new drive fits in your computer and matches the interface (e.g., SATA, NVMe).
Backup Data:
- Data Safety: Backup important data before proceeding with the installation.
Prepare Your Workspace:
- Static-Free Environment: Use an anti-static wrist strap and work on a non-carpeted surface.
- Tools: Have a screwdriver ready if you need to open the computer case.
Installation Steps:
- Power Down and Unplug: Turn off your computer and unplug all cables.
- Open the Case: Remove the side panel.
- Mount the Drive:
- 3.5-inch Bay for HDD: Use the available mounting brackets or screws to secure the HDD.
- 2.5-inch Bay for SSD: Use an adapter if necessary to fit the SSD in a 3.5-inch bay.
- Connect Cables:
- Power Cable: Connect the power cable from the power supply to the drive.
- Data Cable: Connect the data cable (SATA for most HDDs and SSDs) from the drive to the motherboard.
- Close the Case and Initialize:
- Replace the side panel, reconnect the cables, and power on your computer.
- Initialize the Drive: Open Disk Management (Windows) or Disk Utility (Mac) to initialize and format the new drive if necessary.
Post-Installation
Verify Installation:
- Check the BIOS/UEFI to ensure the new RAM or hard drive is recognized.
- Use the operating system’s tools (e.g., Task Manager for RAM, Disk Management for hard drives) to verify functionality.
Install Drivers and Software:
- Install any necessary drivers for new hardware.
- Reinstall the operating system if you replaced the primary drive.
Transfer Data:
- If replacing a hard drive, clone the old drive to the new one or restore from a backup.
You May Also Like

5G: What It Means for You
1 year agoLatest Videos
Top 5 AMAZING Places to Visit in Ethiopi...
Oct 18, 2025Sea waves & beach drone video
Jun 21, 2025Related Articles

The Future of AI in the IT Industry: Tra...
1 year ago
5G: What It Means for You
1 year ago
